Creating a New Deal as an Admin
Navigate the Deal Menu
To create a new deal in Loft click New Deal in the menu on the left.
Make sure to fill in all of the required fields and complete all of the steps below!
Create a new Deal
- Select side (list, sell or double end). If no select made, system will default to List.
- Deal Documentation (attach at least one document from your device to the deal)
- Lead Source (Lead generated by Agent or Company)
- Deal Type (Standard, New Construction - presale, LEASE, ... etc)
- Deal Sub-Type (Single Family or Strata... etc)
- Tick if this is an offer
- Exclusive / Non-MLS
- MLS# (MLS number is required to create a deal. However, if your deal is an offer, exclusive or the deal type isn't standard the MLS can be omitted)
- Property Type (Residential, Commercial). It will default to Residential.
Click the link Enter the address and/or legal description for this property to continue the entry to fill in the address information.
- Enter Property Address or look up address
- Click Save to move forward.
Deal Details
Now your Deal Page has been generated and you can move onto the next steps → Deal Details
A few things to keep in mind:
The Side can be List, Sell or Double end and if left empty will default to List.
The Deal Type will default to Standard. Other options are Project or New Construction, Property Management, Referral, and Lease.
The Property Type can be Residential or Commercial. It will default to Residential.
Make sure to attach at least one document to the deal. (jpg, jpeg, gif, png, pdf, doc, docx, txt, md, odt, rtf, csv, xml, ppt, pps, xlsx, xls)
An MLS number is required to create a deal. However, if your deal is an offer, exclusive or the deal type isn't standard the MLS can be omitted.
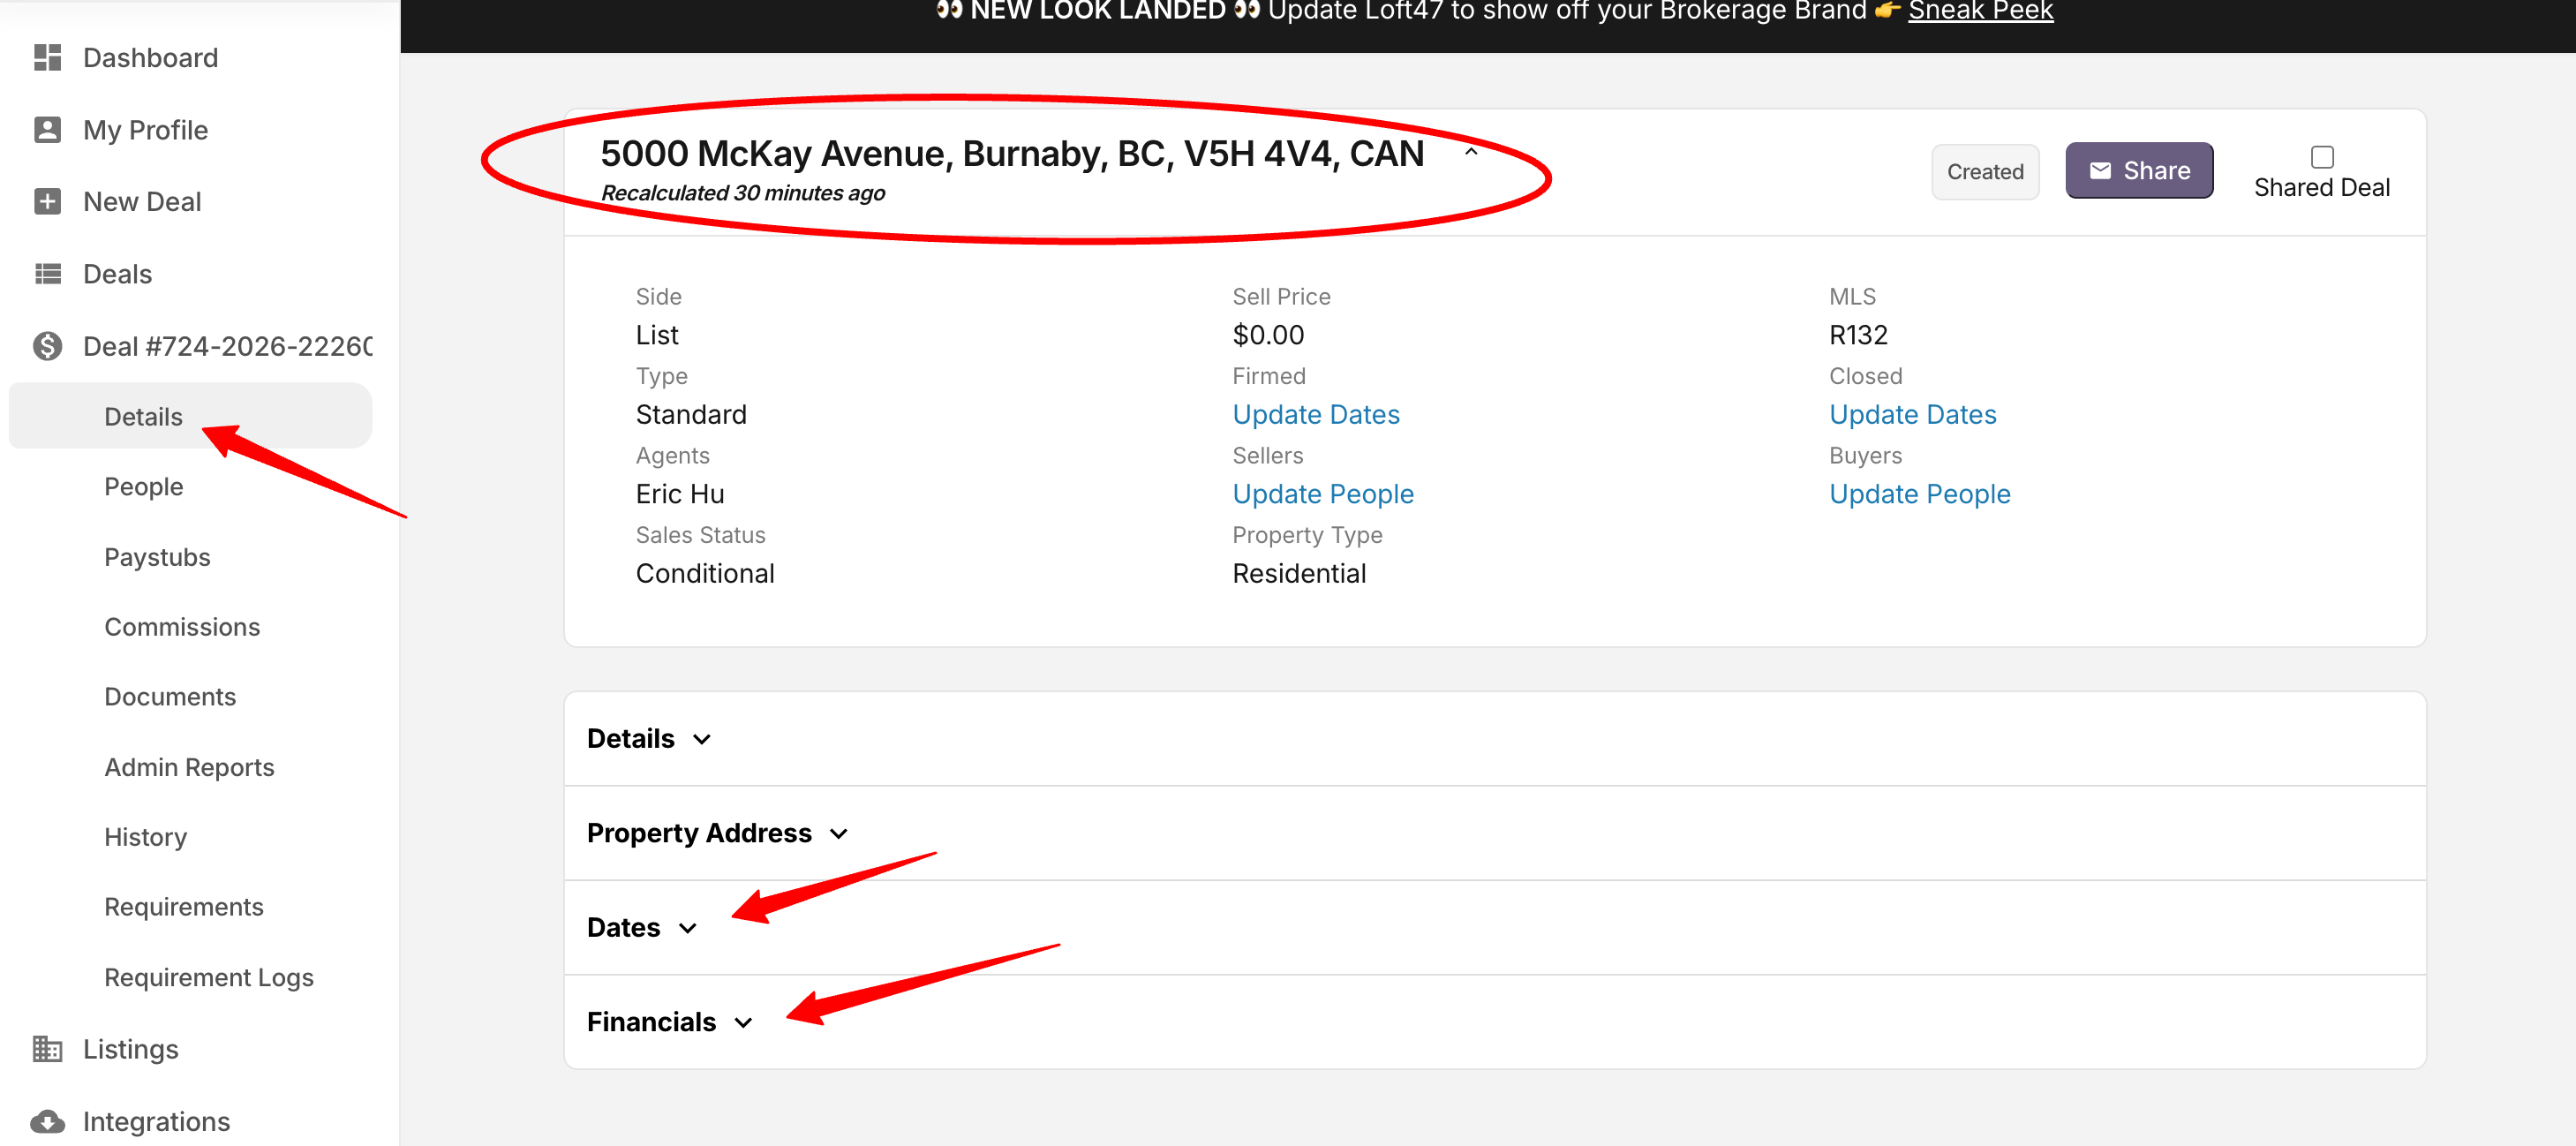
Dates
Make sure to add as many important dates to your deal as possible!
Accepted Offer Date: Date the offer was accepted.
Firm Date: Date that all details are firm. Date generally coincides with Close Date.
Close Date: Date the ownership of the property is transferred from the seller to the buyer.
Adjustment Date: Date parties agree to make adjustments to costs they need to share. Usually the same day or day after the Close Date.
Possession Date: Date the keys are handed over.
Make sure to click UPDATE to save your update, then move onto the next step.
Financials
- Sell Price - purchase price on contract
- Expected Deposit - the deposit amount as per CONTRACT
- Deposit Held By - if deposit is held by other broker, go to People (deal > people > menu on the left) to add the other broker's information, then return to complete this field.
- Deposit Held by Us - tick this if your broker holds deposit as stakeholder
- Cick UPDATE to save your update, then move onto the next step.
Disbursement Notes:
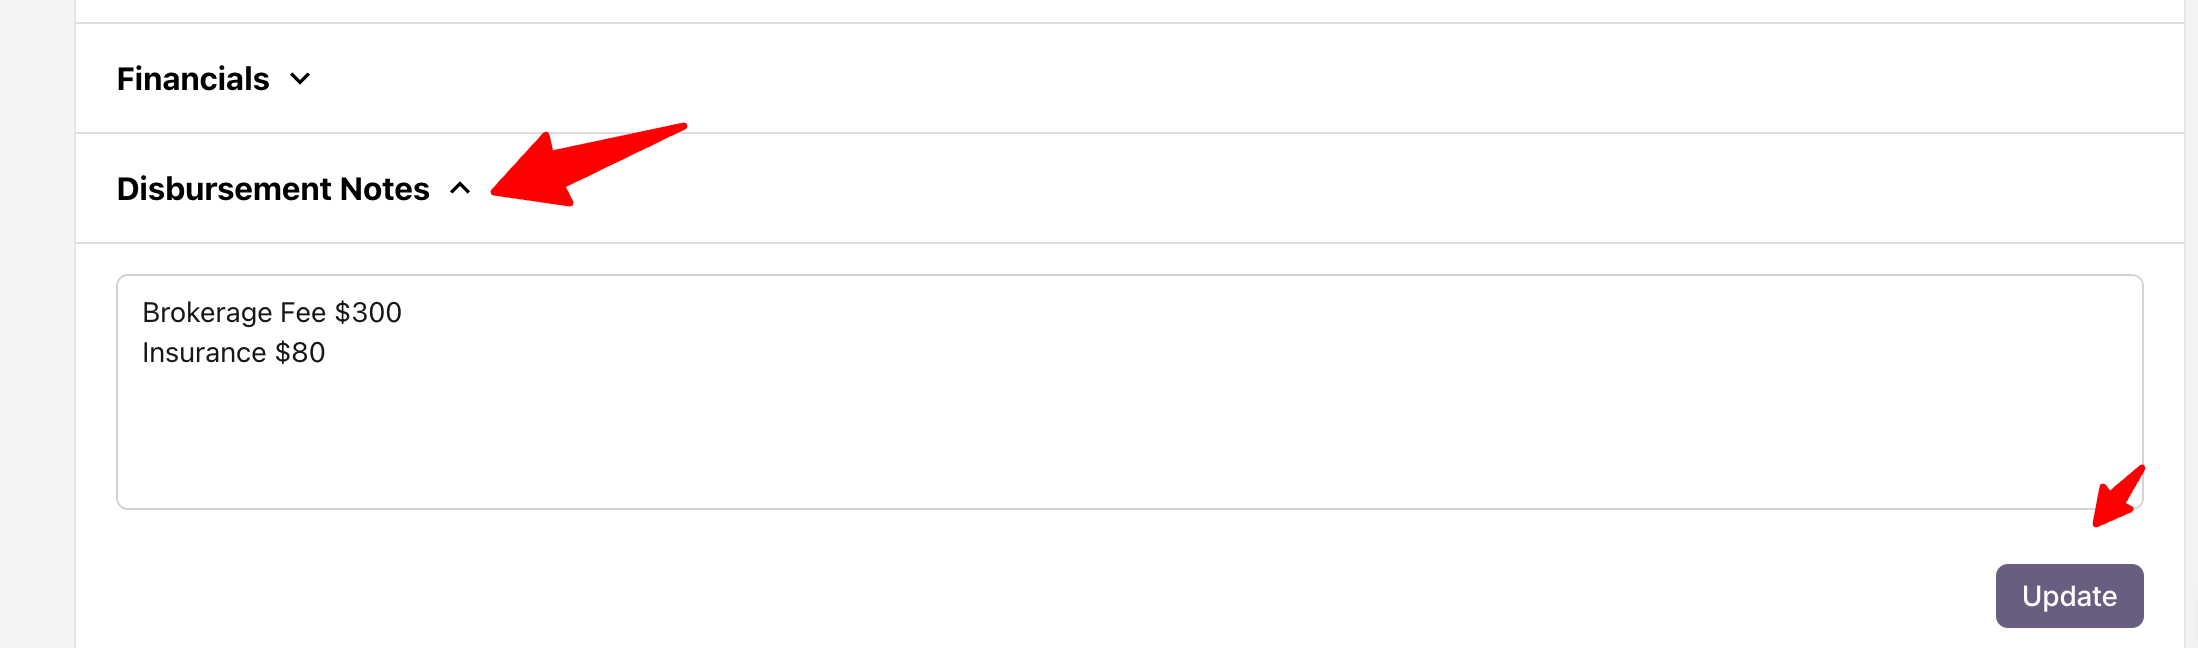
You can add Disbursement Notes on the deal Summary page, allowing users to add internal, document-specific notes.
It is not a required field- but a note section to be used for things like:
payment instructions or payout breakdowns
special handling notes for commissions or deductions
clarification for admin/accounting when reviewing reports
any context that helps explain the disbursement on internal reports
These notes are only visible to Admins and Brokers (not Agents).
You can also include them in reports (Admin or CDA) by adding the tag: {{disbursement_note}}
People
- Click the NEW button (marked with a red arrow on the right in the screenshot below) .
- Search "Existing Profile" if contact is in the system or Create a new profile if contact is new.
- Select a role. Role options are Sellers, Buyers, Agents, Lawyers, Title company, Escrow, Outside Brokerages, Settlement Company and Development company. If the person doesn't match any of those roles, select Other Profile.
- Choose "Side" - List, Sell or Double End
- Save
** For more information on managing people check out Adding People to a Deal.
Commissions
Loft supports two commission setups depending on office configuration: Side Base and Gross Base.
Side Base
- Listing Side (Left) = Listing Commission
- Selling Side (Right) = Selling Commission
- Each side is calculated and displayed separately
Gross Base
- Commission is calculated from the total Gross Commission (Left)
- Sell Commission (Right) = Selling Commission
- Loft automatically calculates the Listing Commission based on the gross split rules (Gross Commission minus Sell Commission)
Bonus / Flat Fee
- Add a flat fee instead of percentage commission
- Add a bonus on top of commissions if needed
👉 You can view Gross Commission by selecting the List dropdown menu. It will show the gross amount on the spot, but will switch back to List & Sell Commissions if your brokerage is set to Side Base.
- Click Update to finish.
*If the new outside broker is not an existing profile, you can create a new profile from the Create a new Profile.
You can add any or all Agents pertaining to the deal in your Allocations page
Comments Section
Custom Deal Tags, Sharing & Team Communication
Add custom tags to deals based on different deal stages or your brokerage's workflow.
Use tags to help your team organize, filter, and track deals consistently.
Internal approving process for Created, Request for Review, Request for Approval, Approved for Payout
Share Deal Communication
Use the Share feature to send deal information and attachments to external parties, such as:
Outside brokerages
Lawyers
Other deal-related contacts
Mark a deal as Shared to indicate that deal information has been sent through external communication.
Team Comments & Collaboration
Use the Comments section to communicate updates, provide context, and collaborate with team members or managers.
Keep important notes, discussions, and decisions connected to the deal record.
Together, tags, sharing, and comments help teams stay organized, improve communication, and maintain visibility into deal progress and history.
Deductions
- Documents - available in all versions
- Requirements - available in the Enterprise version only
- Upload, review, delete, re-name and manage deal-related files, review,
- Organize transaction paperwork
- Track standard document submissions
2. The Requirements Section is part of the Enterprise Version and provides advanced compliance tracking.
- Create strutured requirement templates
- Track mandatory compliance items
- Automate requirement assignments
- Monitor completion status directly within the Deal Summary
- you can upload your documents by clicking upload files as below window
- you can also assign your documents to each requirement by clicking Selecting Requirement
- Once assigned your documents, you can select the requirement link (all links in Loft are blue) to review each required document as below
- You can add comments, upload File, and move on to the next requirement or back to requirement by clicking "<" or ">" and "Back to Requirements" show as below
- Head to the Paystub Section of the deal, here you can view your pending paystub (if the deal is not closed) or your Final paystub (if closed)
- Your paystub will allow you to see your Commissions, Deductions, any applicable taxes, and if pending your Projected YTD, if closed, your YTD totals!
Paying out a deal
- Creates deals in seconds from uploaded contracts, eliminating manual setup and reducing processing time.
- Auto-Population of Deal Fields (parties, dates, amounts, terms) are populated according to the contract content.
- Identifies key data and signatures from the document, links them to the correct parties, and makes them available in the deal and preview for validation.
- Fast, Effortless deal creation - Ready When You Are! ✅
Related Articles
Office Admin Role and Permissions
These Administrators will have the equivalent of Agent-access with a few extra options to assist in creating, reviewing, and processing deals on behalf of the office. These Admins will only have access to view Agents and deals within their assigned ...What's New in Loft47 (2026): New Features & Enhancements
? We're excited to introduce our 2026 feature updates! This release includes enhancements inspired by customer feedback, along with new capabilities we've developed to help your brokerage work more efficiently and stay ahead of industry changes. ...Creating a New deal as an Agent
To create a new deal in Loft click New Deal in the menu on the left. Make sure to fill in all of the required fields and complete all of the steps below! Create a new Deal Select side (list, sell or double end). If no select made, system will default ...Your Definitive Guide to Email Templates
Welcome to the ultimate guide for creating and formatting Email Templates! Loft provides the capability to create & format your templates several different ways as outlined in our Key below: TEMPLATE KEY Email Body A template can be created for use ...Creating a listing
Create a Listing Head to your Listings Module, click the New button Add *required fields Add Agent Add MLS if there’s no MLS, check the Exclusive/Non-MLS checkbox Enter the Listing Price Enter Property Type Click the blue 'Enter address' link to ...